
Creating Print Ready PDF Files In Adobe Illustrator
This video and written tutorial outlines how to export a print ready PDF file from Adobe Illustrator. This video is made using Adobe Illustrator but is the same steps in earlier or later versions of Adobe Creative Suite - Adobe CS
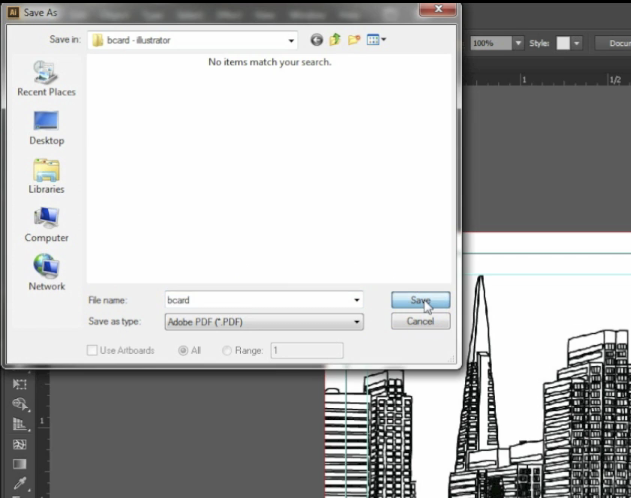
Once your layout is complete go to the File menu and Save As.
In the dialogue box you will select Adobe PDF as the File Type, enter the name of your file and click save.
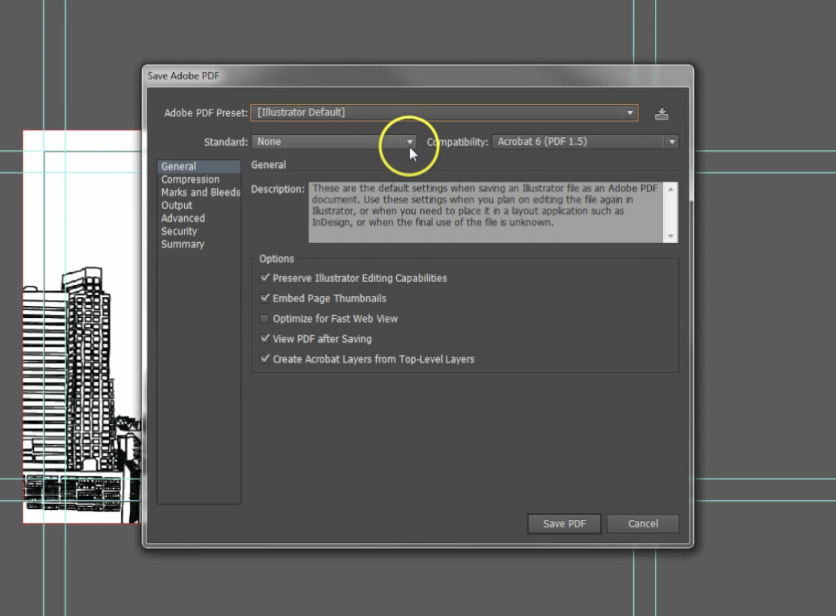
Now, in the PDF dialogue, under General select Illustrator Default as the Adobe PDF Preset.
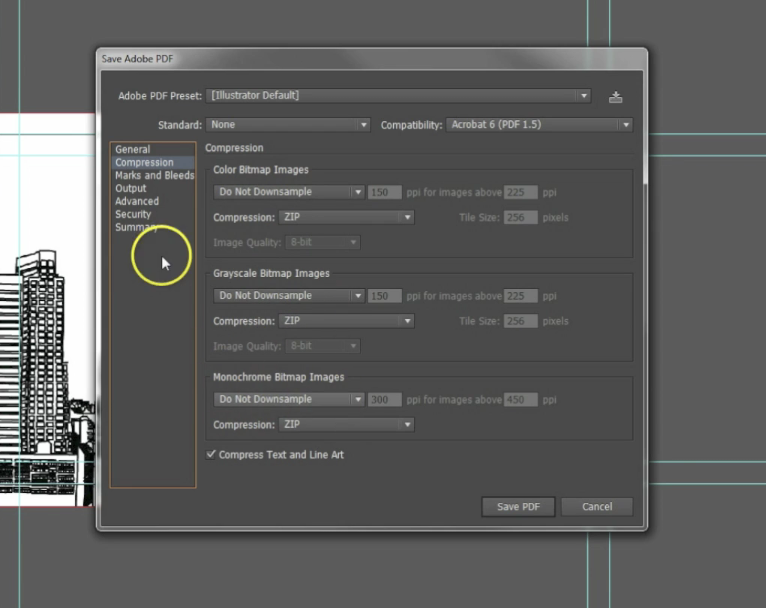
VERY IMPORTANT on Compression, ensure you are not down-sampling anything. Ensure each dialogue box reads Do Not Down-sample.
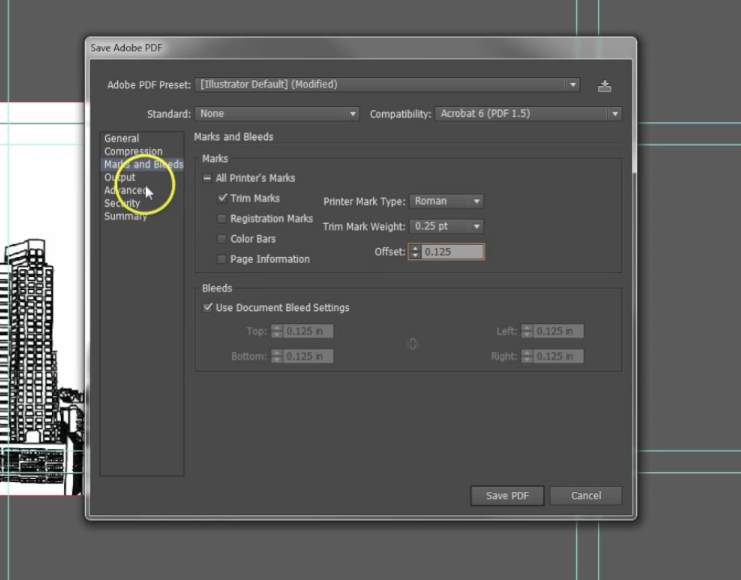
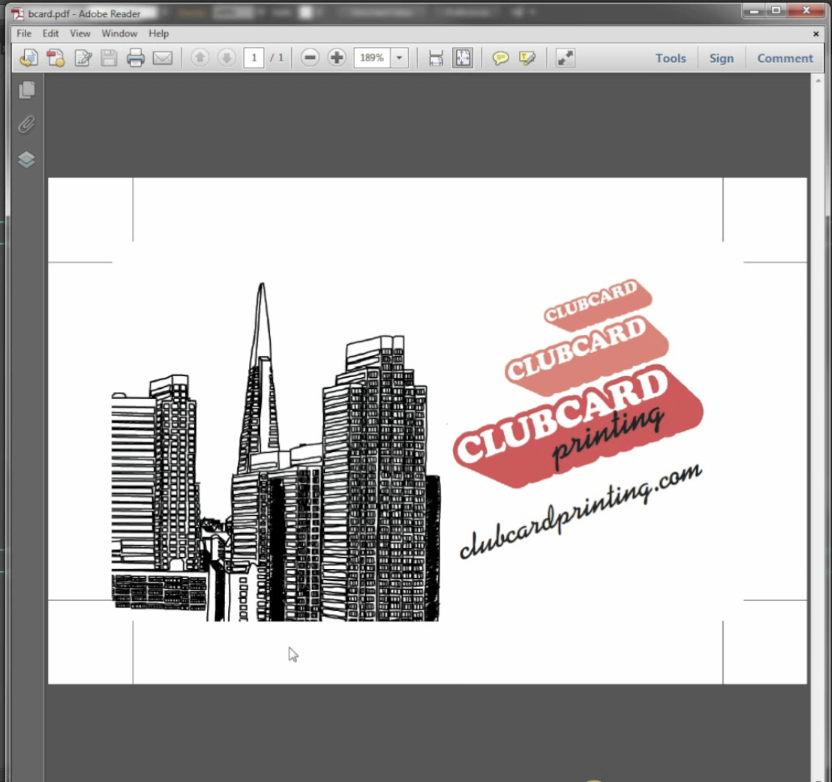
MARKS & BLEEDS - click the Marks and Bleeds tab, check the Trim Marks box and for Offset enter 0.125. This ensures your crop marks will be outside of the bleed area. Ensure the 'Use Document Bleed Settings' box is checked and confirm your document is setup with a 0.125" bleed on all sides.
Now click 'Save PDF'. You now have a print ready PDF setup in Adobe Illustrator.

Leave a comment